Hey Umi friends!! We hear a lot about Team Umi Zoomi from our now 3 year old, so when I asked if she wanted an Umi Zoomi party, she was so excited and talked about it for a couple months before her party (and even the few weeks after it). It is a really cute show on Nick that is a math based show. But also, it is only in its second season, so as of now, they don’t have any licensed party supplies. They did, however, have a lot of stuff on the
Nick, Jr website… printables, crafts, recipes, games, etc. So, that was super helpful in my planning. I printed and cut out a couple table centerpieces, posters, game posters with stickers, placemats, made Milli headbands and Geo’s shape belts, I made my first pinata from scratch!, and made Milli cupcakes, and decorated with other items I found online. (I will describe more under the pictures.) We invited a few of her little friends and well…. see for yourself! 🙂

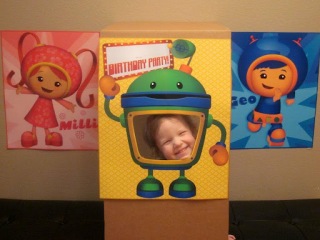 |
| The birthday girl in Bot’s Belly Screen on the photo wall. Printed these from nickjr.com and attached Bot to a cardboard piece that I folded (at the top) and tacked to the wall. Worked really well. So, the kids could just sit on the bench and get their picture taken! (this one was before I wrote Trina’s name on the poster) |
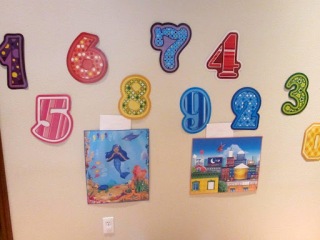 |
| The posters are for a couple games we played where everyone took turns putting on the stickers. (found on Nickjr.com) and the numbers are from Oriental Trading. |
 |
| Another nickjr activity I had on the wall (but we never really did the activity) … it was mostly for the older sibblings that came to the party. |
 |
| Flowers were made (reused) from my Cricut and the laterns and tissue fans were from JoAnn Fabric’s dollar section! |
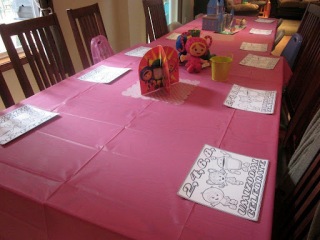 |
| Placemats to color as guests arrive and in between activities to keep the fast kids busy! |
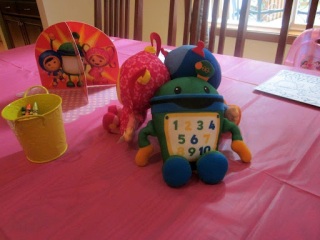 |
| Was thrilled to see that they had these stuffed animals at Toys R Us! |
 |
| Another printable (with lots of assembly required) from nickjr.com |
 |
| paper fans (made similar to this, but to make them large, you need to glue 4 sheets (12X12) together end to end after creating the fan pleats.) I put a Milli sticker in the center. |
 |
| Loved these flower balloons from the local party store |
 |
| Left this up from the last party we did! |
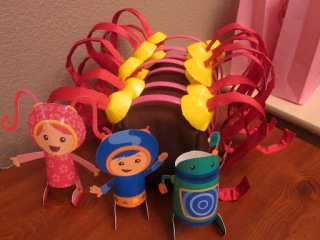 |
| Because I would want to know: The display for the Milli headbands is made from taking a piece of fabric and batting and wrapping it around a Quaker Oats container and pinning it in place. And the characters are more printables from Nickjr |
 |
| The pinata just after I added the pull string to it. I forgot to take pictures of the process of making it, but I used this website for instructions. |
 |
| printed Umi Zoomi stickers to put in the pinata |
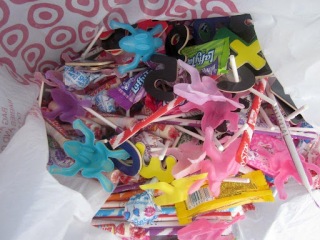 |
| more pinata stuffers |
 |
| the finished product… it was actually super easy, just a lot of fringe cutting and gluing it on, but it actually didn’t take as long as I thought it would!! and the pull strings worked way better than the ones I have previously bought from the store. |
 |
| Party favors, Geo’s shape belt, Milli headbands and favor bags |
 |
| Inside is a hand clapper, crayons, magnetic numbers, and some shapes, and a coloring book. I was going to make the outside of the bags like this, but ran out of time. |


You're awesome. 🙂
LikeLike
Just found this on Pinterest, and your daughter looks like she had a blast. Great party (I love the belly screen for photos)! Thanks for taking so many pics and explaining how you did things too (I'm a very visual person, so hopefully I can do a few of your ideas for my son's party this winter). He was ALL about Bubble Guppies a few months ago, but now all I hear about is Team Umizoomi. 🙂
LikeLike
did you make the shape belt? i'm thinking of making a Geo costume for my 3 year old for halloween this year.
LikeLike
yes, I did make the shape belt similar to the one on the Nick Jr website, but I used wide orange ribbon and felt for the shapes.
LikeLike
Hi there–how did you make the shape of your pinata? I'm doing an umizoomi party for my little girl and want to attempt a pinata:) Also, did you get that decal off the nickjr website? Thanks!
LikeLike
Katy, for the shape, I cut 2 circles the same size, one for the front and one for the back, then I cut a LONG strip (as wide as you want the depth of the pinata to be) and it needs to be the length of the circumference of the circles. Then I just duct taped the long strip of cardboard in between the 2 circles with the seam at the top and you can add a wire to hang it and it holds that seem together as well. Hope that makes sense.The image came from here: http://www.nickjr.com/flex_article/assets/wallpaper/umicity-wallpaper/umicity-wallpaper-wallpaper-wide.jpgBut I did have to go into photoshop and extend the star to make it bigger and added the words I wanted.Have fun with your party!
LikeLike
that is very creative… I'm in the process of planning my son 2 years old bday party and he's in love with Bot and Geo… so your Idea truly help me out to finish planning it.. I got some of the items on ebay.com like: party shirt, party hat, invitation card, party banner and cake topper at real good price… but i could not find centerpiece till i came across your page… you are amazing.. thank you super mom
LikeLike
How did make milli headband inore details
LikeLike
just click on the word Headbands under the picture and it will take you to the Nick Jr page with step by step instructions
LikeLike
Hi Mellu,I am worried i will run out of time looking for umizoomi party ideas. My daughter's bday is on January 2014 but thank God i found your blog 🙂
LikeLike