2017 Kid Calendar

Wow!  It has actually been a whole year since I have posted anything on my blog!  Whoops!  It’s been a busy year!  We did manage to get another calendar done for 2017.  We have done these for the last 4-5 years and the girls love making their own artwork and having their own calendars in their room to mark up throughout the year.  Here is 2017 with some ideas for ya.  Happy New Year!

ages

jan

January – We made these birch trees by painting a little black paint on white paper and and smearing it across the paper keeping the paper mostly white.  Once dry, they cut it into strips with it being slightly thicker at the bottom and thinner at the top.  The bird is a red circle cut in half for the body and the other half into thirds for the other triangles for the wings, tail, etc.

feb

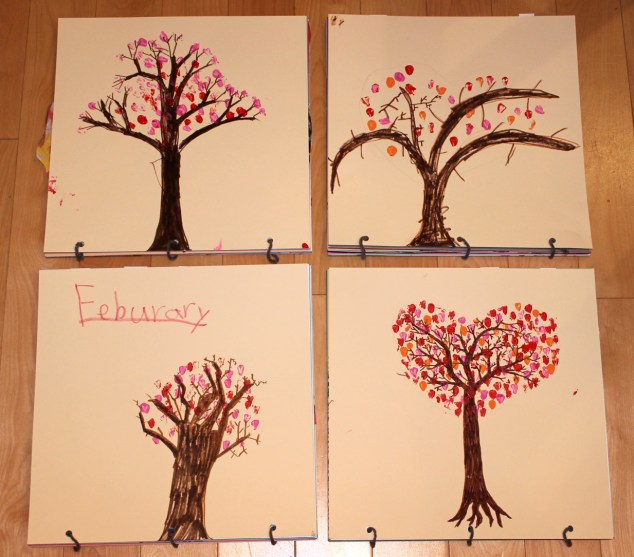
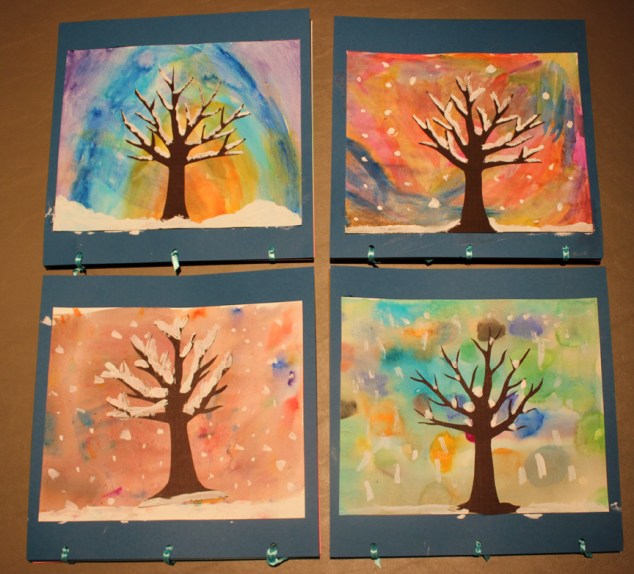
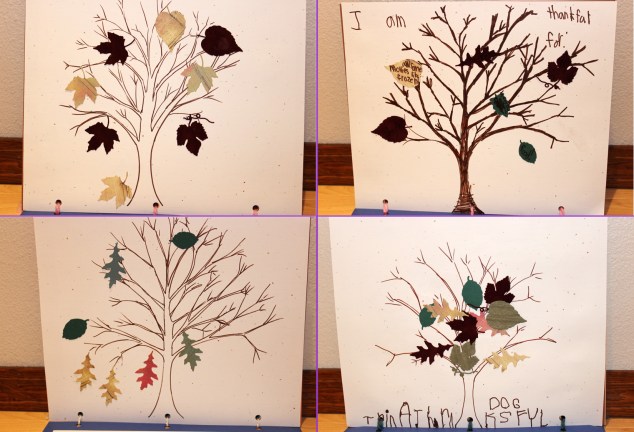
February – The idea was to have it look like the bottom right, but not all the kids had the patience to do that.  I had a little heart stamp and they used paint to stamp the hearts onto the tree after they drew and colored the trunk.

mar

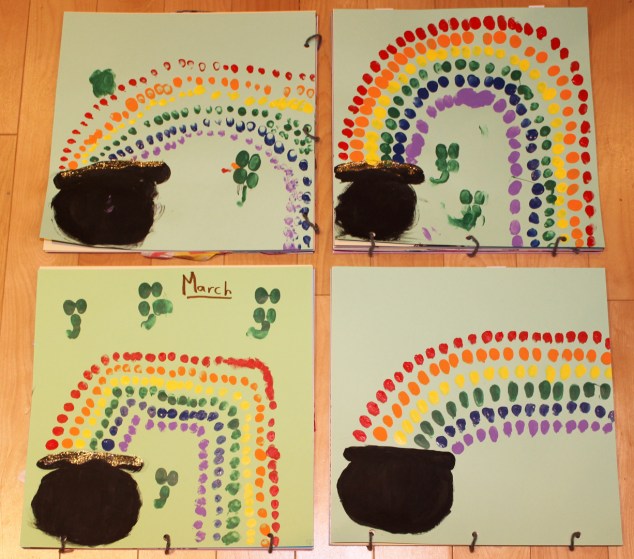
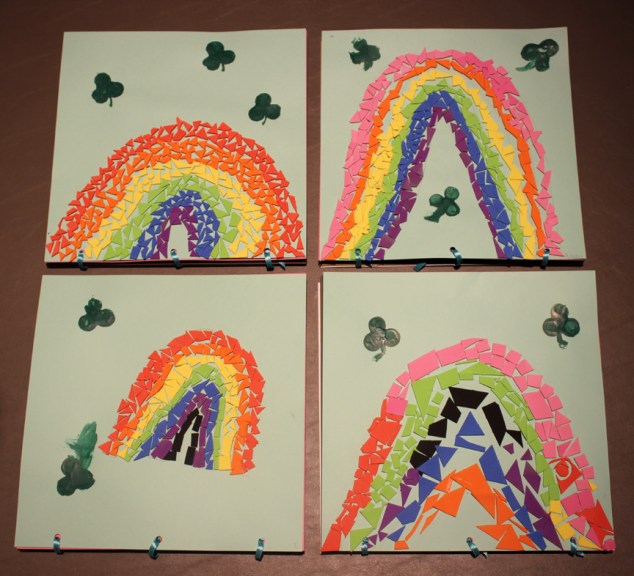
March – We painted a pot of gold and finger painted on the rainbow.  (And make a mess all over the bathroom sink with all the washing between colors.  ;p  )  We added gold glitter glue to the pot after the paint dried

apr

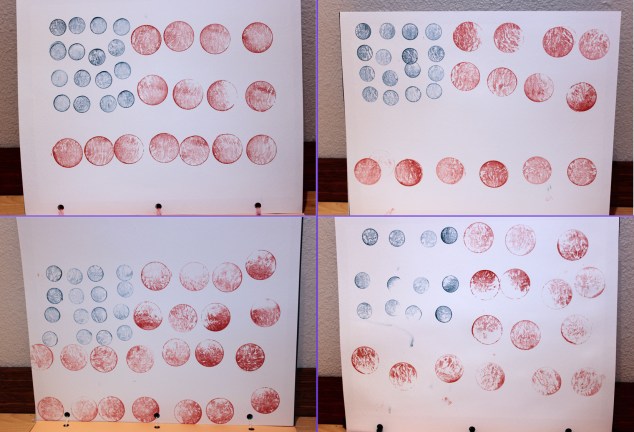
April – Potato stamping.  I actually wouldn’t recommend this.  It was the first time I tried it.  I used a spoon to scrap out a halved potato to make the design and then they dipped it in paint to stamp.  As you can see… they didn’t really work out that great.  Some paint got clumpy and some didn’t take well.  It sounded fun, but chalking this one up to a Pinterest Fail.

may

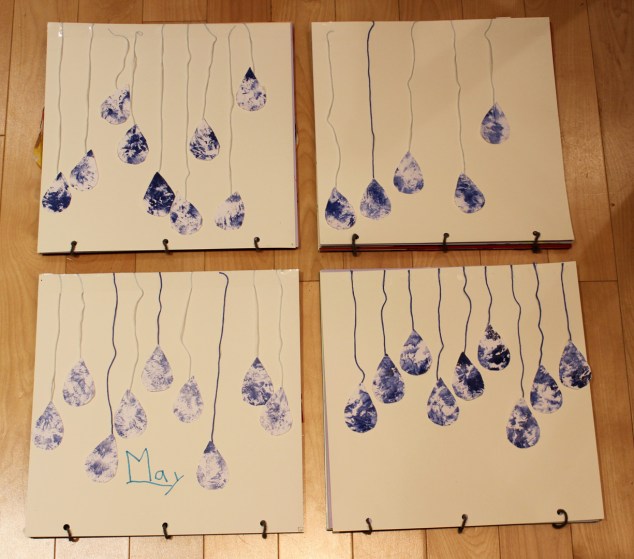
May – We made blue blotches with paint all over a white paper, let it dry, and then I printed out a raindrop template I found on a google image search and they traced and cut out the raindrops, added them to string and we taped them onto the paper, so they are hanging.  

jun

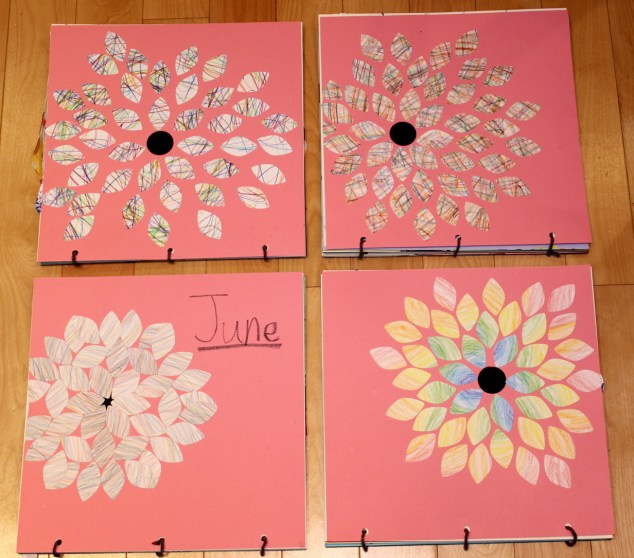
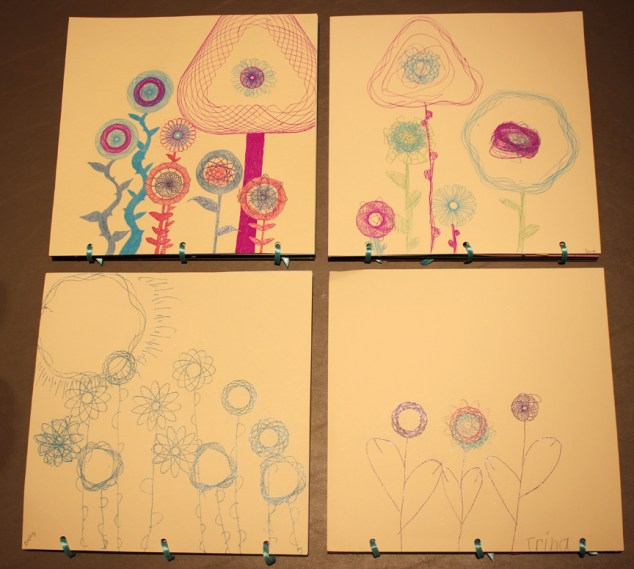
June – the girls scribbled all over a sheet of white copy paper with vibrant colored pencils (markers would also work) and then cut out all the shapes on my Silhouette (you can do this with a punch or by hand, but the Silhouette is much faster).  The kids then glued them around a black circle to form flower petals.

jun_closeup

June – closeup

jul

July – This was fun!  I have always wanted to try to make our own scratch magic paper and it totally worked beautifully!  So, you have to fill the entire paper by coloring with oil pastels (if there are spots missed, it won’t be able to be scratched off).  After the paper is all colored, then you paint black acrylic paint over the entire thing.  We had to put a second layer in some spots.  Then set it aside to dry.  Once dry, you can take some scratch tools and make your design.  I noticed it is more vibrant when you scratch a thicker line like the bottom right.  🙂

aug

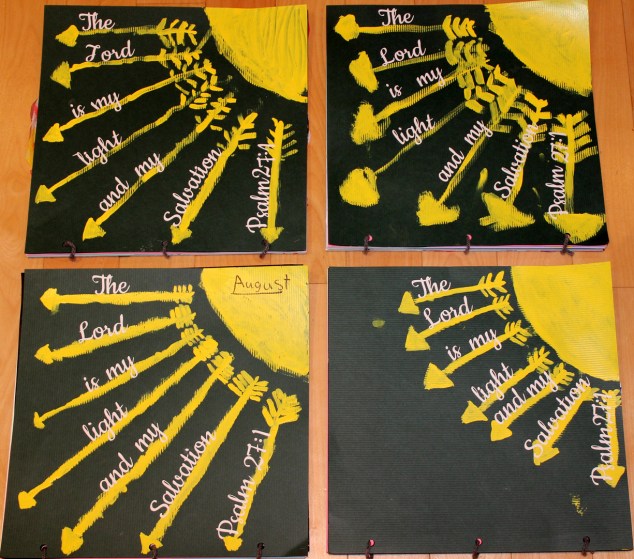
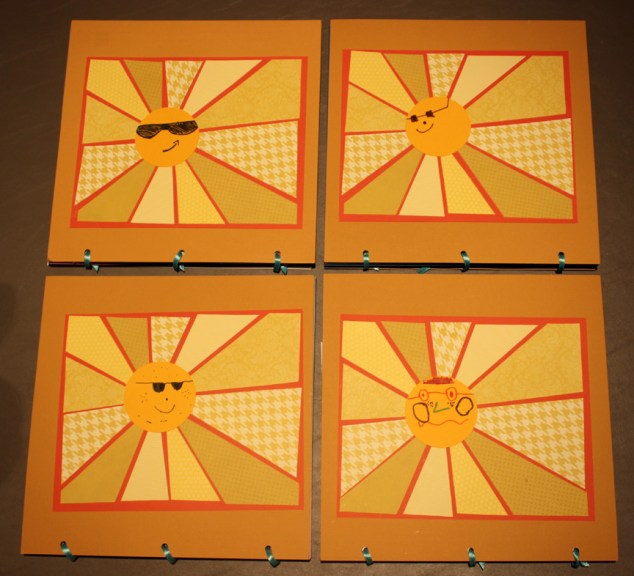
August – The girls drew a sun with 7 arrows and I cut out the words of Psalm 27:1 on my Silhouette to glue on.  I helped draw out where the arrows should go with the younger kids, but they did all the painting and glueing!  

sept

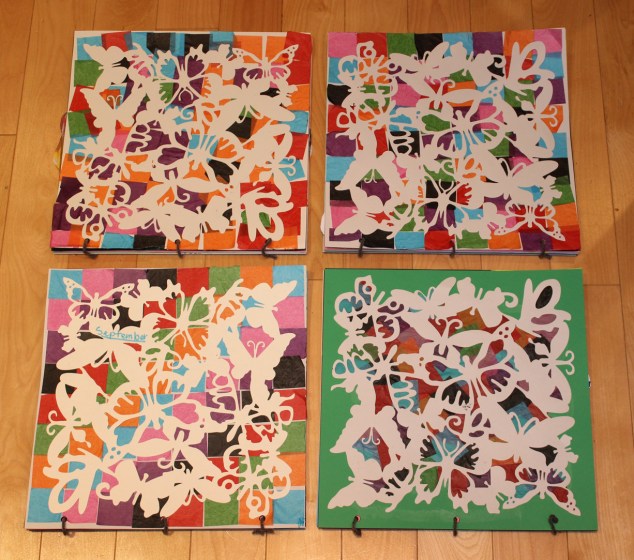
September –  We used some scrap tissue paper squares to glue onto the large paper and layed the butterfly Cricut cutout on top to give it a stained glass look.

oct

October – These tree tops are painted onto coffee filters with water colors and set to dry, then they cut out the tree shapes, glued them onto the paper and added the trunks that I cut out on my Silhouette. (you can cut these by hand or paint them on as well)

nov

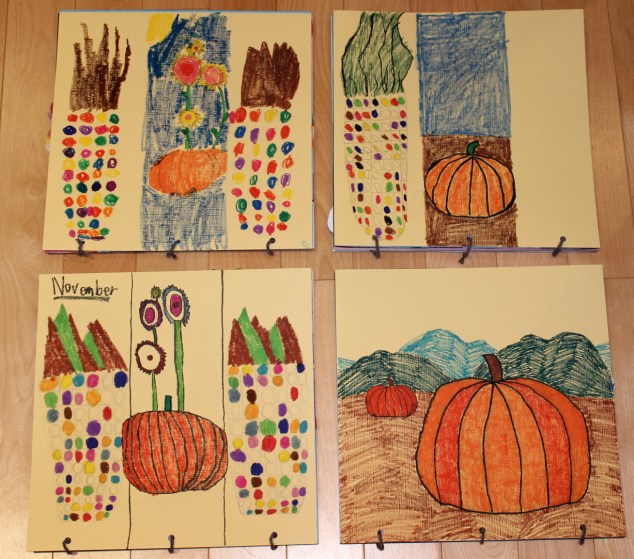
November – We used markers to color in some corn cobs and pumpkins

dec

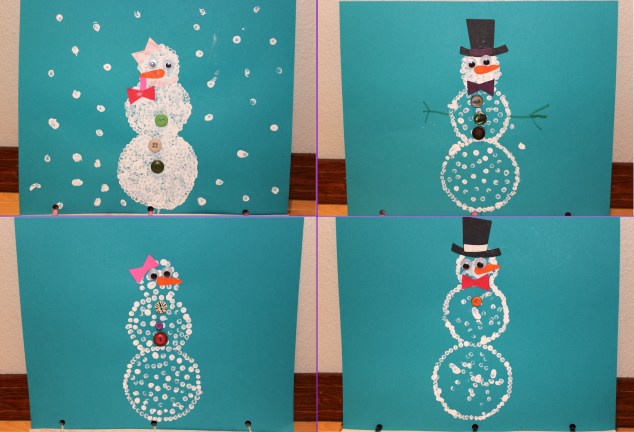
December – Q-tip painting the trees with ornaments.  

2016 Kid Craft Calendar

Here is the calendar we finished up this year!  It was fun to have the neighbor kids join us for the calendar making fun this year (our traditional Christmas break activity).  Here are pictures of what we did this year!

January

January – Water color background, paper cut out trees and painted snow.

February

February – Heart paper penguins and stamped hearts

March

March – Foamy mosaic rainbows and Clovers made from 3 wine corks rubber banded together as a stamp

April

April – puddle made from blowing a blob of paint with a straw and then Hello Kitty is cut from my Cricut

May

May – Kites cut with tissue paper behind and foamy bows

June

June – Spirograph flowers with gel pens

July

July – Fireworks stamped with bent straws stuck together.

August

August – Flower made from cut out patterned paper

September

September – made from paper stencil (cut from my Cricut) and dotted paint with Qtip inside

October

October – Prismacolor white pencil on black paper (used ruler to draw long lines)

November

November – Painted trees and leaved made with a paper towel or toilet paper roll as a stamp

December

December – paper strip trees

Kid Craft Calendar 2014

Forgot to post these from a couple years ago.  Every year between Christmas and New Years, the kids and I make a calendar for their rooms with a different craft each month.  Here is the version from 2014!

kid-calendar_Jan

January Snow men (painted with Qtips

kid-calendar-Feb

February – Hearts out of oil pastels

kid-calendar-March

March – stamped heart clovers

kid-calendar_April

April – tissue paper crosses

kid-calendar-May

May – flowers cut from my cricut

kid-calendar_June

June – Butterflies (painted and folded in half)

kid-calendar-July

July – dot stamped flags

kid-calendar-Aug

August – Sand dollars made with paper and quinoa glued on

kid-calendar-Sept

September – paper pinwheels

kid-calendar-Oct

October – paper candy corn collage

kid-calendar_Nov

November – Trees with leaves cut from my cricut

kid-calendar-Dec

December – paper snowflakes (and snowflake stickers)

Lemon and Lime theme

I don’t have any new parties to add at the moment, so here is an old one that I never posted.  We did a Lemon and Lime theme for an Appreciation party.  The platters were made from cups and plates from the Dollar Tree.  The cups were spray painted and apoxy’ed to the bottom.  The placemats are cut from my cricut with the lace cartridge.

WP_000168

WP_000167

WP_000244

IMG_0900

IMG_0901 IMG_0902 IMG_0904

IMG_0906

Ladies 40th Birthday Party

I got the privilege of throwing a 40th birthday party for one of my best friends a couple weeks ago.  It was fun to have a bunch of ladies over to celebrate with her.  Here are the pictures taken by my friend Amy (who does a WAY better job taking pictures than I do… thanks Amy).

IMG_0675

.

IMG_0700

Love these paper fans. Idea from Pinterest

IMG_0669

.

IMG_0664

.

IMG_0663

These are so good! I served them at a New Years Party last year. Here is the recipe!

IMG_0661

Also very yum! I love this site for cute little bite size recipe ideas. Click HERE for recipe

IMG_0659

Sweet and Sour Meatballs brought by my sweet friend Jessica.

IMG_0657

Angie loves this awesome FRUIT SALAD that I make for a lot of events and it is always a hit.

IMG_0762

Thanks to Lindor Chocolates for Red and Black wrapped yumminess to go with the color theme.

IMG_0696

How cute are these little cups and spoons from Amazon.com!! This recipe was specifically for guests with food allergies. I always like to try to have a little something for them. This Coconut Chocolate Mousse has only 3 ingredients! Recipe found HERE and you have to be careful on which brand of coconut milk you use. I used Chaokoh brand (and I did the suggestion of pouring it into a bowl and letting it get cold in the fridge overnight).

IMG_0693

.

IMG_0692

.

IMG_0689

oh man these were amazing. I probably ate a third of them. (of course I was starving because I don’t take time to eat on party days.) Too bad prosciutto is so expensive or I would make these all the time. Recipe HERE

IMG_0685

.

IMG_0684

I have made this for years from an old Pampered Chef cookbook. And now I see they have the recipe online HERE

IMG_0650

.

IMG_0641

.

IMG_0646

water plus frozen strawberries

IMG_0645

.

IMG_0697

These cranberry martinis were so yummy and aren’t they pretty! Recipe HERE. I did reduce the vodka for this party to 1 oz.

IMG_0673

I got to use my chalkboard painted coasters again from this party. I bought these plain coasters and sprayed them with black chalkboard spray paint (takes around 3 coats) and then people could write on them with chalk to keep track of which drink was theirs.

IMG_0672

These centerpieces contain Red LED submersible lights, clear water beads, and rose floating candles. I just put a ribbon around the vase and voila!

IMG_0733

.

IMG_0727

.

IMG_0821

Happy birthday Angie!

Frogs, Snails, and Puppydog Tails Baby Shower

A couple months ago, I hosted a small baby shower with a super fun and cute theme: Frogs, Snails, and Puppy dog tails.  Here are a couple pictures:

IMG_4298

Covered the table with burlap and covered the vases with darker brown burlap

IMG_4293

Froggy watermelon carving. I found the instructions HERE. So cute!  Napkins are from Amazon.

IMG_4294

I made “snails” from ham and a cream cheese pesto mixture rolled up in tortilla shells. My plan was to do THIS with pickles for the body, but my time ran out… still looked snail-like without that though!  Frog candies and frog bath toys are from Amazon.

IMG_4295

Puppy dog tails are crockpot little smokies. Here is the super easy recipe I used.

IMG_4296

The yummy desserts are from Whole Foods bakery… yummo!

IMG_4297

And the straws are also from Amazon.com

We just played one game and it was the baby shower Memory Game that I mentioned way back HERE.

For more ideas, check out my pinterest board and also check out these SUPER cute framed pictures from ETSY… LOVE this shop!!

Thanks for stopping by!

Sofia the First Party

We had a Sofia the First Party for my 5 year old.  It was so cute and we just love Sofia around here.  I got carried away with all the little detailed crafts on this one … I had lots of fun with that part.  I should have planned a couple more games or activities, but it all worked out in the end.

IMG_4201

This was a fun (yet time consuming) little craft for the front door. below is a picture of how I did it.

IMG_4202

I got to reuse these flowers from a couple years ago… made from my cricut flower shoppe cartridge

IMG_4203

.

IMG_4205

IMG_4207IMG_4206When the girls arrived, I had them start by decorating crowns while we waited for all the guest to arrive.


IMG_4219

IMG_4218

IMG_4216

Below is a tip on decorating a cake stand in a temporary way that won’t damage your platter.

IMG_4215

found this super cute butterfly dish from HomeGoods

IMG_4212

Birdies and flower from Michaels Craft Store

IMG_4211

I hot glued giant jewels onto wooden skewers and then added the grapes

IMG_4210

IMG_4209

Lace glued onto mini water bottles

IMG_4208

guess I didn’t get a picture after I made the punch, but it had raspberry sherbet in it … yum…

IMG_4214

Saw this adorable sofia the first cupcake cake idea on Pinterest. The white pearls are sixlets candy and the amulet is a homemade purple hard candy (in a jewel mold)

We watched an episode of Sofia the First during snack.

IMG_4240

FYI… spray adhesive works better to hid the seams on a printed image, but I didn’t do that this time… whoops

IMG_4235

cake time

IMG_4237

IMG_4239

cake face

IMG_4251

parachute games to fill some time (see my lack of planning games this time above)…

IMG_4246

crawling under the parachute

IMG_4222

party favors … found these super cute crocheted flowers in the dollar bins at Michaels and I hot glued a barrette to the back. Inside the bags are stickers, cheap tiaras (that I added some jewels to, to make them sparkle) and these (earring/ring set)

IMG_4220

I made amulets from beads from Michaels onto a thing ribbon. made the mistake of not making the ribbon long enough for some kids to get over their heads… 😦

That’s the party!  Now here are those last 2 how to projects mentioned above:

IMG_4200

I just took 2-3 strands of heavy gauge wire and made it into a large “5” … then cut little squares of purple tulle (you can barely see them on the table) and bunched them in the middle and hot glued the center onto the wire. Lastly I added some butterfly clips as shown in the top picture.

IMG_4193

Under my cake stand I attached some scotch packing tape around my platter (and stuck another one under it with sticky sides together, so it was only stuck to the platter at the very top and wouldn’t stick to it below.) Then you can hot glue whatever tulle, ribbon, fabric or lace onto the tape. When the party is over, just cut it all off… so this is pretty much a one time decoration.

How to make a jeweled placeholder

IMG_4167I wanted some cute placeholders to display the food titles for my daughter’s Sofia the First party.  So, here is a tutorial for you all who are interested.

IMG_4170

Here are the supplies needed: 12 gauge floral wire, bottle caps, jewels, hot glue gun, wire cutter, needle nose pliers, round tip pliers (optional) and something with a sharp metal point (I used a compass)

IMG_4173

poke a hold in the middle of the bottle cap with a sharp metal point.

IMG_4186

Measure about 8″ of wire and cut

IMG_4178

insert wire through bottlecap

IMG_4179

bend the end and press it in

IMG_4180

hot glue to secure the end

IMG_4185

bend wire in half about half way through and using the rounded tip pliers, swirl the end all the way to the bended part.

IMG_4184

keep that swirl going

IMG_4169

after completed, hot glue a jewel sparkle over the swirled part at the top and some jewels on top of the bottle cap.

IMG_4192 IMG_4188

Frozen Party

Here are pictures from my 7-year-old’s Frozen Birthday Party with descriptions and links below!

IMG_4070

The wreath is Styrofoam wrapped with white tulle and I cut out some snowflakes on my Cricut with the Winter Lace cartridge. The printable Olaf is found here.

IMG_4072

I used the idea from Oh Happy Day to make these fun party hats.

IMG_4073

Frozen party supplies where hard to find back in March/April, but I managed to find a few things! I am sure supplies are more available by now.

IMG_4069

Blue LED Lights and some crochet and embroidered snowflakes and white tinsel as a table decoration.

IMG_4089

making beaded bracelets with pearl beads and clear tribeads

IMG_4088

Snowcap Punch recipe hereIMG_4087 And snowball sign holders found here.

IMG_4083

AKA Powdered sugar donut holesIMG_4079IMG_4081IMG_4082IMG_4085IMG_4086

IMG_4077

The Disney Frozen figurines are from the Disney Store… Sven fell into the cake and I loved how it looked with cake on his nose, so I just left it… He is a little mischievous sometimes, so it worked. I just bought the plainest white cake I could find and decorated it myself. The idea found here. I made the blue ice with a simple hard candy recipe like this. and the snowflake sprinkles are from Wilton.

IMG_4090

We played a Frozen scavenger hunt based on the lyrics of Let It Go… brilliant game and thanks so much to the Bombshell Bling for this free printable

IMG_4091

finding clues and at the end of the hunt, I had a bowl full of snowflake barrettes for each girl to pick one.

IMG_4099

We played a very fun game called Don’t Eat Olaf! It was a crowd favorite for sure (despite a couple tears when things got too loud). I saw it on Etsy.IMG_4096IMG_4097

IMG_4094

Another game we played was to divide into 2 teams and each team decorate one person into a snowman using toilet paper and hats, scarves and carrot nose. The birthday girl got to pick the winning team with the snowman she liked best.IMG_4093

IMG_4075

in addition to the bracelet and hair piece from the party, the kids also got a book and stickers for party favors

IMG_4071IMG_4105 IMG_4103 IMG_4102

Here is a link to my Pinterest board for more ideas!