Team Umi Zoomi party

Hey Umi friends!!  We hear a lot about Team Umi Zoomi from our now 3 year old, so when I asked if she wanted an Umi Zoomi party, she was so excited and talked about it for a couple months before her party (and even the few weeks after it).  It is a really cute show on Nick that is a math based show.  But also, it is only in its second season, so as of now, they don’t have any licensed party supplies.  They did, however, have a lot of stuff on the Nick, Jr website… printables, crafts, recipes, games, etc.  So, that was super helpful in my planning.  I printed and cut out a couple table centerpieces, posters, game posters with stickers, placemats, made Milli headbands and Geo’s shape belts, I made my first pinata from scratch!, and made Milli cupcakes, and decorated with other items I found online.  (I will describe more under the pictures.) We invited a few of her little friends and well…. see for yourself!  🙂 
The birthday girl in Bot’s Belly Screen on the photo wall.  Printed these from nickjr.com and attached Bot to a cardboard piece that I folded (at the top) and tacked to the wall.  Worked really well.  So, the kids could just sit on the bench and get their picture taken!  (this one was before I wrote Trina’s name on the poster)

The posters are for a couple games we played where everyone took turns putting on the stickers.  (found on Nickjr.com) and the numbers are from Oriental Trading.

Another nickjr activity I had on the wall (but we never really did the activity) … it was mostly for the older sibblings that came to the party.

Flowers were made (reused) from my Cricut and the laterns and tissue fans were from JoAnn Fabric’s dollar section!

Placemats to color as guests arrive and in between activities to keep the fast kids busy!

Was thrilled to see that they had these stuffed animals at Toys R Us!

Another printable (with lots of assembly required) from nickjr.com

paper fans (made similar to this, but to make them large, you need to glue 4 sheets (12X12) together end to end after creating the fan pleats.)  I put a Milli sticker in the center.

Loved these flower balloons from the local party store
Left this up from the last party we did!

colorful containers from the Dollar Tree

Milli Cupcakes

Milli headbands

Because I would want to know:  The display for the Milli headbands is made from taking a piece of fabric and batting and wrapping it around a Quaker Oats container and pinning it in place.  And the characters are more printables from Nickjr

The pinata just after I added the pull string to it.  I forgot to take pictures of the process of making it, but I used this website for instructions.

printed Umi Zoomi stickers to put in the pinata

more pinata stuffers

the finished product… it was actually super easy, just a lot of fringe cutting and gluing it on, but it actually didn’t take as long as I thought it would!! and the pull strings worked way better than the ones I have previously bought from the store.

Party favors, Geo’s shape belt, Milli headbands and favor bags

Inside is a hand clapper, crayons, magnetic numbers, and some shapes, and a coloring book.  I was going to make the outside of the bags like this, but ran out of time.

Owl birthday party!

Well, its April again, so we just celebrated the 1st of 2 birthdays.  My 5 year old was looking through the list of party themes from the Birthday Express catalog, and she loved the owl blossom party supplies, so we went with that theme.  I started by crocheting amigarumi owls for decorating the room (Ravelry has a ton of cute patterns).  After deciding on my upcoming 3 year olds party theme, we got our orders together for birthdayexpress.com and orientaltrading.com.  I just love getting all those fun supplies in the mail! 

Last week, we had 16 little party friends come to have a hoot at our Owl party.  My little birthday girl had a lot of fun and we even got a sunny day!  Here are the pictures: 

Had trouble with this flipping in a bit.  😦  Oh well
Love these wall stickers from birthdayexpress!  And I can now move them to a bedroom for a cutsie wall


When the kids arrived, we started with a craft:  painting owl suncatchers.  I found these great markers from JoAnns to use instead of paints.  Was super easy for a 5 year old to do, but they do like to glob it on, so it did take a while to dry. 
Owl aprons to put on to protect their clothes from paint!

Next up, I printed and glued this own onto some cardboard… cut the mouth hole out and the kids had a beanbag toss into the owls mouth.

My mom helped by making these super cute bean bag mice out of felt, string tail and a pompom nose.

Decorations over the food
food display… saw the idea for the wood displays and platter stands on pinterest!

we had some allergy kids coming to the party, so I tried to make sure we had things they could have!

Gluten free rice krispie cupcakes

Don’t you just love cupcake cakes?

the betty crocker butter chocolate cake mix was SUPER yummy…  I recomend you try!! and I don’t even usually like chocolate cake!)

Was thrilled to see this on orientaltrading (they were for Valentines, so I even got them on clearance!)

Oh … and happened to find these owl label stands in the dollar section at JoAnns!

pinata

presents
party favors
the boys got a wallet and the girls got an owl purse and they got to keep their aprons, suncatchers, and loot from the pinata.
After the party, the kids got to go outside and play to burn off some sugar.  🙂  Again… super thankful for the sunny day!  Happy birthday sweet girl!

low key pizza and movie party

Well, time to write about another party!  We just had one turn 8 years old at our house!  This year my daughter wanted to do a sleepover party, so with that decision, the deal was that she could only invite 3 kids over (plus her sisters for the movie part) and I wouldn’t be doing a super involved party this time.  But of course I just can’t help myself and did do a little something to make it cute!  🙂

We had pizza and cake, then the girls watched “The Tooth Fairy” and before the movie, they got to pick a mini pillow pet (to keep as the party favor), a boxed candy, and fill their cup with an assortment of popcorn choices.  It was cute and I think the girls enjoyed themselves. 
The “sleep”over was a bit harder… there is always the one girl that wants to sleep, the one that wants to bother/bug and the ones that just want to chat and giggle… can be a hard combo sometimes.  It may be a few years before we do more than 1 friend again!

Anyway, let’s get to the fun part… Here are some pictures from the party:

Got the cute unicorn party supplies from birthdayexpress
Extra large mylar
For the individual popcorn cups: I printed the names on white cardstock and stapled them on the backside to form a cylinder, cut a circle for the bottom about a half inch larger diameter than the cylinder, then pushed and bent it up into the bottom and stapled it around the base. 

For the larger popcorn bowls, I have a set of green mixing bowls that are different sizes and all fit into each other.  I thought, what if I just make “covers” for them and set the bowl inside.  So, I measured each bowl from table to just under the rim and the diameter, printed the striped design and label I made on the computer (had to glue a few sheets together to make the diameter large enough), and just set the bowl into them (unlike the individual cups, there is no paper bottom, they just go around the bowl).  I loved how it turned out and will definitely use that idea for future parties!
cupcakes from whole foods and we just added some sprinkles
Mini pillow pets as party favors (only worked because we had a small enough party for it to be do-able)
We happened to have a stuffed unicorn which came in handy for the centerpiece
pizza time
Happy birthday to you….
the theater is all ready … where did that teapot come from?
Movie time
Happy birthday Elise!  Love you!!!

Candyland Birthday Party

Welcome to Candyland!  This was a super fun party to create (but I think I do say that about most of the kid’s parties).  I decided to set up the house to look like a life-size candyland game board.
I did have a hard time getting started, so first I studied the candyland board games:  we have an older one and the new style one.  I actually used more from the older one, because I liked the variety of candy characters/places better.  The new board is a little too.. um.. busy… and the candies are a little more similar to each other.  Anyhoo… so I made of list of the “areas”:  Plum trees, rainbow trail, peppermint forest, gumdrop mountains, Licorice Castle (changed to Licorice Lagoon from the newer game), Peanut Brittle House, Lillipop Woods, Ice Cream Sea, Molassis Swamp (changed this to Chocolate Swamp), and last, but not least the Candy Castle.  I just started brainstorming ideas for each area and jotting those down.
I even made a playlist of candy related music to play, but then forgot to play it… boo.

Then I drew this rough map of my living rooms/kitchen… and how I wanted to set up the “game” (where all the sections would go).

I ordered supplies from my 3 favorite party websites:  Oriental Trading, Shindigz, and Birthday Express.  Also picked up some things from Ben Franklin, Bartells, The Dollar Tree, and Fred Meyer. 
So, I always find it easiest to just talk about the party as we go along.  So, here’s what the guests arrived to:

The giant lollipops are made from ballons taped to a baton I found at the dollar store and then wrapped in cellophane.  I stuck them in buckets filled with sand to keep them upright.
Aren’t these 2 great!  they’re from oriental trading!

As we were waiting for everyone to arrive, we had the kids decorating their goodie bags.  Note: don’t use elmers glue when doing this… took too long to dry… next time I will only use the stickers/sticky backed jewels.  lesson learned.

When everyone got there, we played the game.  I had taken out the colored cards from the board game and each kid drew a card and moved to that color square on the floor.  There are a ton of pictures, so I will just post a bunch!

Some stations had a little goodie bag gift to put in their bags.  We actually went back around a second time to grab those.  🙂
The rainbow trail led to the punchout game and the peppermint forest.

At the other end of the rainbow, I placed a “punch-out” game that I made.  See my previous blog post to see how we did that.  This we also came back to play on our second time around the game, so each kid just took a turn punching and getting a prize.

Candy canes and candycane pencils for the goodie bags.
I added glue and glitter to these popcorn and trash buckets from the dollar store to make them look like gumdrops.
I pinned bright colored blankets over beanbag chairs and pillows to make them look like the gumdrop mountains and the kids had to climb over them!  🙂
Here, I hung streamers to hopefully look like black licorice and the coat rack worked perfectly to make the licorice tree!

hung 2 brown curtaina that I had in my dining room, with pressure rods over the doorway for Grandma Nut’s peanut brittle house.

Inside the peanut brittle house I printed and cut out peanuts to hang from the ceiling and also taped some to the wall.

more cellophane covered ballon lollipops.  didn’t know how to get them to stand up, so I propped up a baby gate and covered it with a blanket.. then stuffed in the dowels.  (note that the bigger 3 lolli’s are attached to white wrapping paper rolls and the 6 smaller lolli’s are on wooden dowels)

You may remember the ball shaped decorations from here:  so I covered those with cellophane and whallah!  Dave helped me with the string between the walls to hang them from.

 Whew… hang in there only a couple more places to visit!

DO NOT EAT… these are play putty.  I was excited to find something for the theme that wasn’t candy!!
bubble wrap on the floor, so they can pop through the ice cream sea (the board game had lot of bubbles around Queen Frostine, so since a bubble machine probably would have been a little too messy for inside, I thought of this. 
not much decoration here.. just some more brown curtains on the floor for the chocolate swamp and a bench for a bridge to crawl over it!
Here is home of King Kandy!  Lots of yummies that the kids got to go around and load up their goodie bags!  (sorry parents)

this would have worked a lot better with dummies instead of these suckers… but oh well.

bought a plain white half sheet cake from Fred Meyer and then decorated it with colored fondant and lots of goodies!

The gingerbread pieces are from the board game

this is the older board game… like the one I grew up with.

Happy birthday to my amazing 6 year old!

Mr. Men Little Miss 2 year old party with Kindermusik

 My baby is 2! Cannot believe it! For her 2 year party, I did another Kindermusik party (I have done that with all my kids’ 1st and 2nd birthdays). I found some Mr Men Little Miss on major clearance at birthdayexpress.com and I thought they were cute when I was a kid, so I went with that! We decided to have a joint birthday party with a friend (who happened to have the nickname Mr Man), so it worked out great. Not a whole lot to talk about, so let’s just go to the pictures!

music time

check out the cool rainbow cake Tracy made
loves her new sleeping bag from nana and papa L

And the baby from a bigger sis
favors for the siblings

favors for the 2 year olds
HAPPY BIRTHDAY SWEET TRINA!!

4 year old Princess party

A few weeks ago, my daughter turned 4 and after changing her mind quite a few times, she decided on a princess party.  So the first thing I did was hire a “real” princess to come out to our house.  I had been to another birthday party and saw her there and she was amazing with the kids and told them a story with puppets for probably 20-30 minutes long and the kids were so engaged … boys and girls!  She was great and had to much energy.  So, I requested her to come.  Then, the night before the party, the company called and said our princess threw her back out and wouldn’t be able to come the following morning and they don’t have any backups!  Thankfully this all happened while I was out and my awesome husband, called another company and was lucky to find another princess with time to come out to our party!  Whew!  I was thankful I didn’t need to come up with other activities to do for the party or dress as a princess myself!  Eeek.  (Turned out she was great also, so another bonus.)  The party was so cute and my daughter had a lot of fun. 
Here are some pictures from the party:

I made the princesses and other decorations on my cricut.. very time consuming, but love how they turned out!

last minute decision to add some princesses to the table!

was happy to find a non-disney princess at birthdayexpress.com

wands and swords to decorate while the princess did face-painting

Storytime!

cake from Fred Meyer

homemade jewel candy for favors

favors
HAPPY BIRTHDAY CAYLEY!!!

Around the World birthday party

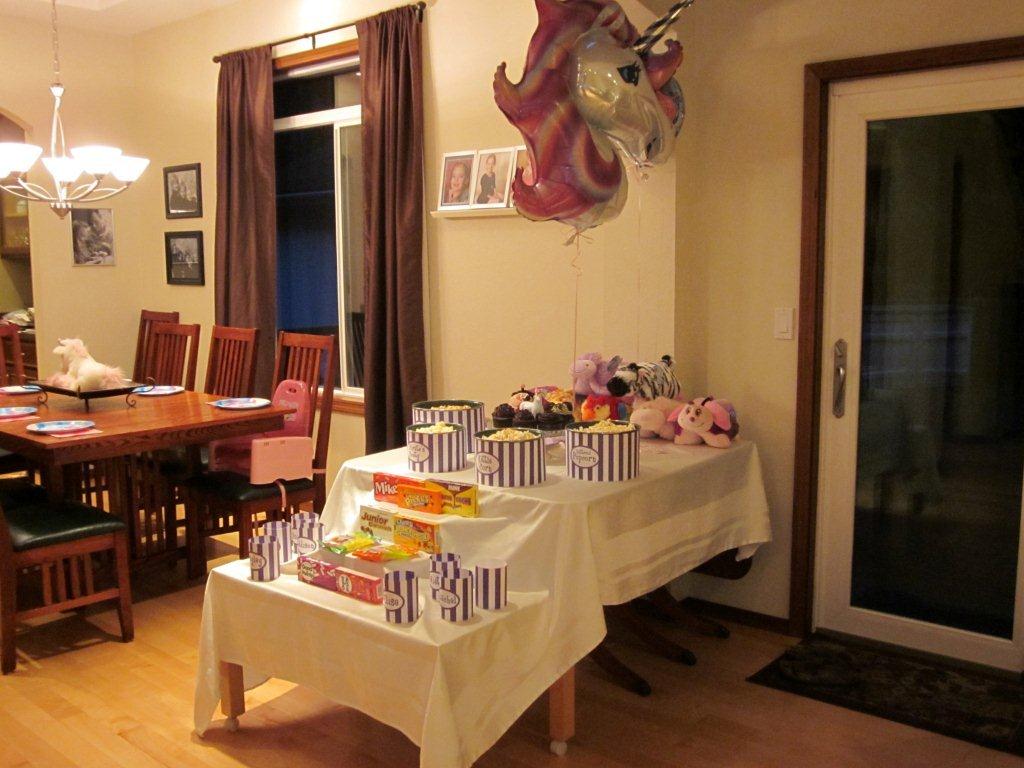
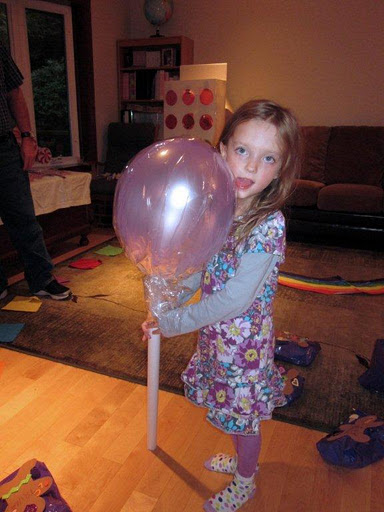
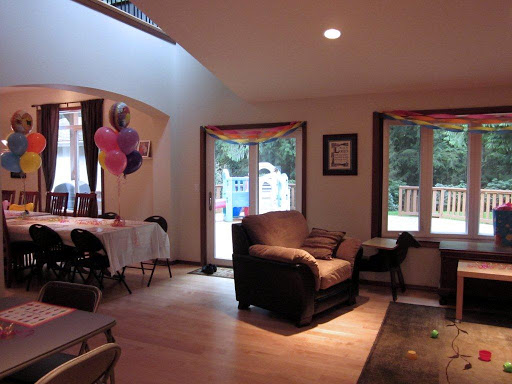
A couple nights ago, we celebrated Elise’s 7th birthday with an Around-the-World birthday party.  We had 12 girls here and we boarded Birthday Airlines and visited 7 different locations on 7 different continents.  It was a fun party to plan and she and the other girls had a great time.  Here are the details!
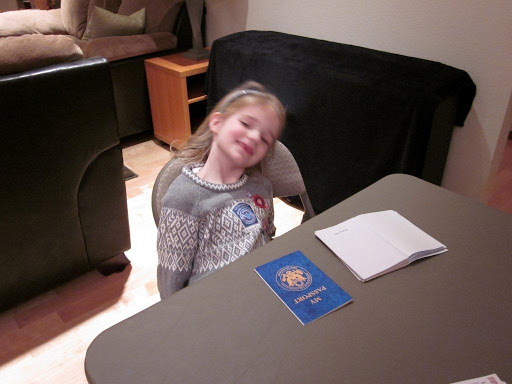
When each girl arrived, we welcomed them and I took their picture (to put it their passports later), then they went over to see Agent Elise at the US Customs and Immigration table where they were given a passport with their name inside.  I got these cute little passports from Oriental Trading.

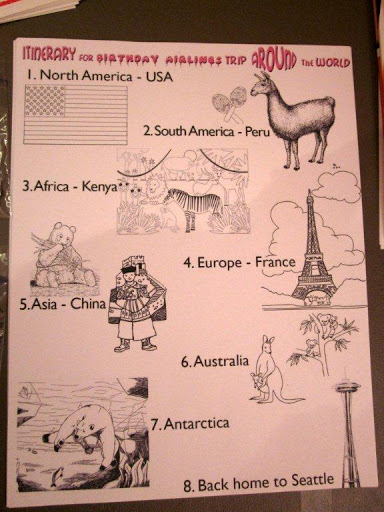
Then the girls were given these itineraries to color while we waited for the other guests to arrive:
So, we then all loaded the “airplane” (and all the kids grabbed onto a rope).  We (my husband and I) introduced ourselves as the pilot and flight attendant and we described briefly that we will be visiting different countries and getting souvenirs from each place we visit. 
our name tags

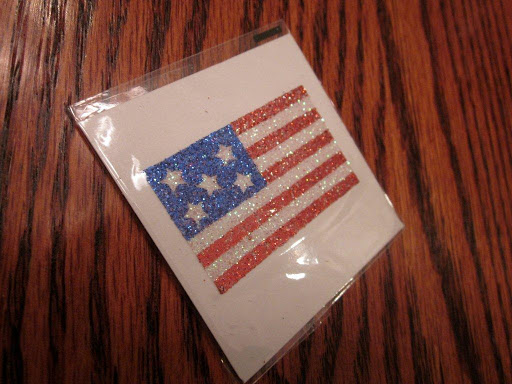
1st stop:  North America – USA – Minnesota – Mall of America
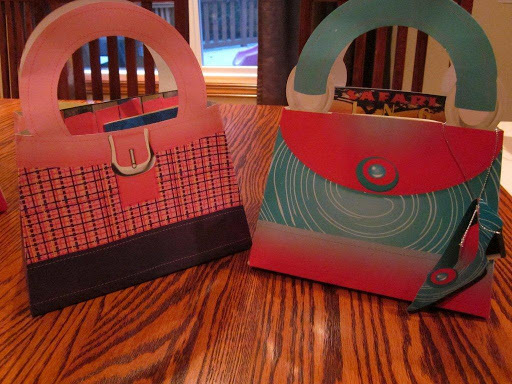
We made a stop at the Mall of America in Minnesota (upstairs in our room) as our USA stop.  There, the girls took turns “shopping” for their luggage to take on the trip.  They also received a USA glitter tattoo and a red, white and blue sucker.  Then we “stamped” their passports for the next stop.

forgot to take a picture before the party, but all the purses were lined up top.
the “luggage” they each picked one

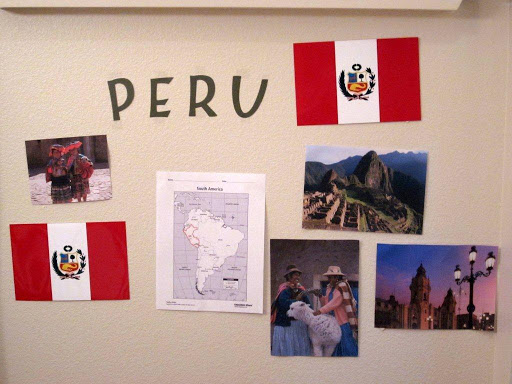
2nd stop: South America – Peru
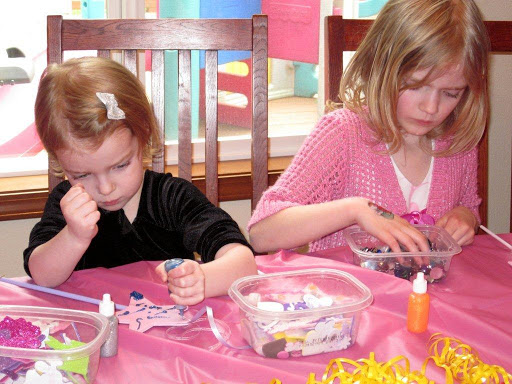
We flew back downstairs to Peru (the dining room) where all the kids were able to decorate maracas with wood markers. The maracas were the souvenir.

For each country, I printed out their flag, map and a few pictures from the country.
the inside of the passports… there was a country stamp and I printed an animal or icon on sticker paper to stick in there.

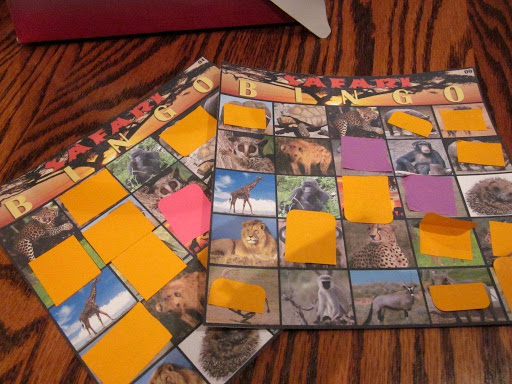
3rd stop: Africa – Kenya
Next up was Kenya (the living room).  Here we played Safari bingo.  I made bingo cards with a lot of different safari animals.  There was no prize for the winner, but the girls had a fun time.  I didn’t have bingo markers, so I used cut up post it notes… worked ok, but they really stuck together, so it was a little difficult for the girls to use, but the good thing was that they stayed in place if they moved or bumped their cards.  
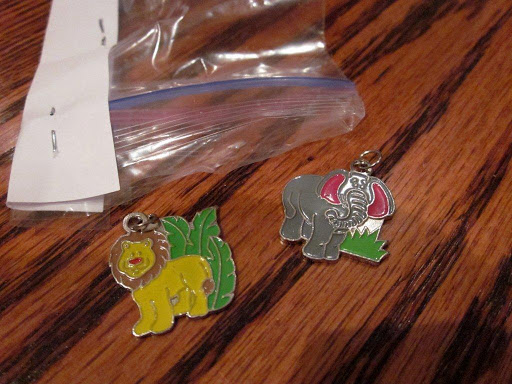
The souvenir for Kenya were safari animal charms (2 per child) in a little package I made out of ziplock snack bags (because I forgot to buy tinsy jewelry type ziplock bags… these would have been much better.)  They also got to keep their bingo cards (which they were surprisingly excited about).  🙂
Oh.. and we played African music in the background during the game.

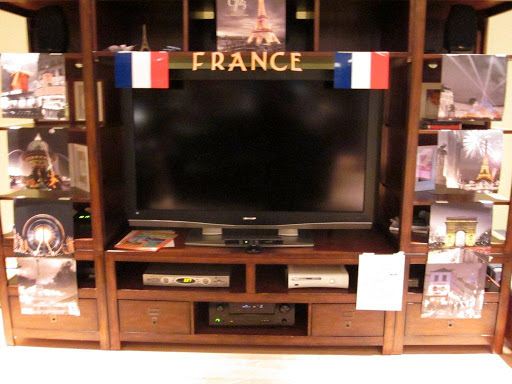
4th stop:  Europe – France
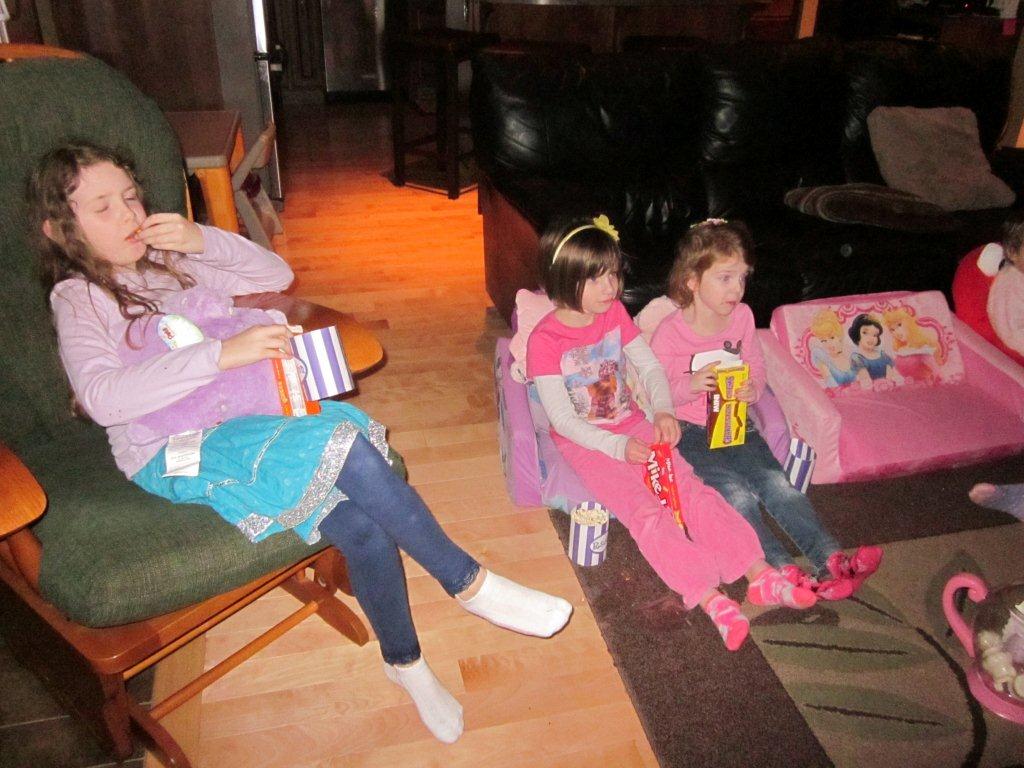
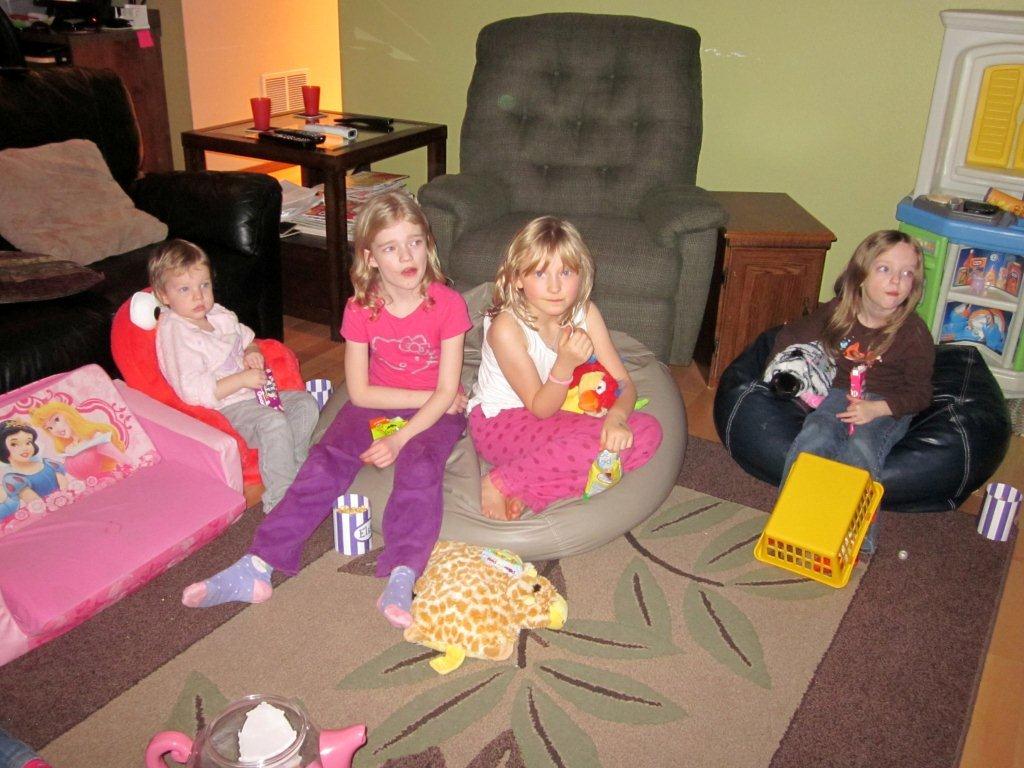
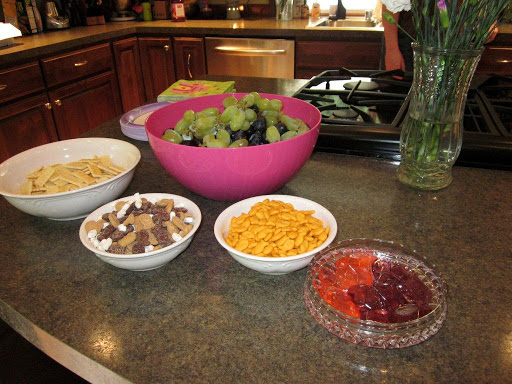
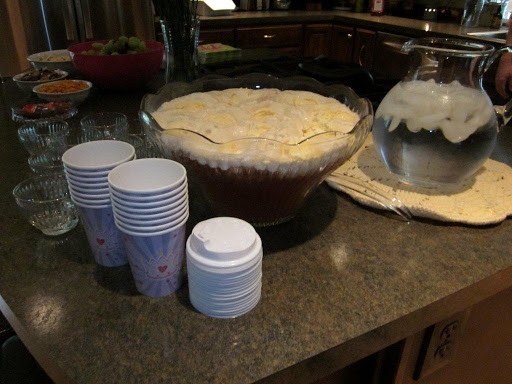
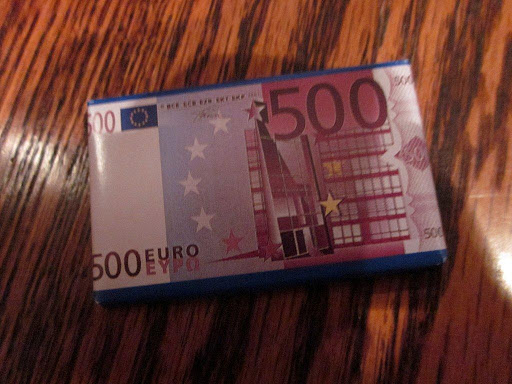
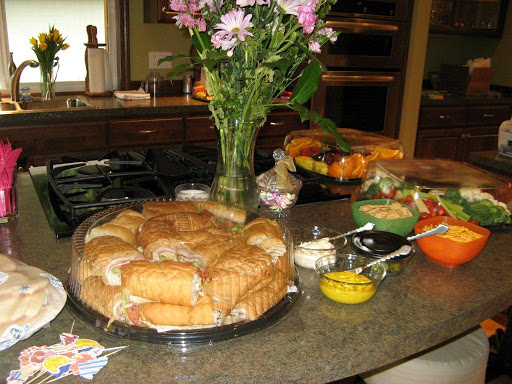
After “stamping their passports”, we headed over to France in the family room.  Here, thanks to Instant Netflix, we watched an episode of Madeline (was supposed to be the one about the Eiffel Tower, but there was a technical issue and they watched the one about the Louvre).  Madeline is a cartoon about a girl from France.  While they were watching the 20 minute show, it gave me time to set out the food and cook the pizza.  After the show, they collected their Eiffel Tower charms (ordered from Etsy and shipped from China… he he) and their Euro chocolates (from World Market) and they took a quick train ride to Italy for some pizza, breadsticks, salad, fruit and juice boxes.

After lunch we headed to our 5th stop:  Asia – China
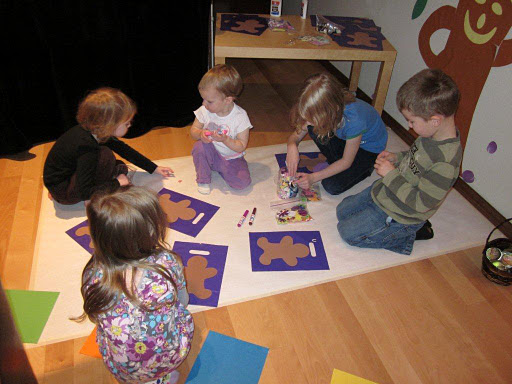
China needed to be in the entryway (I was running out of rooms).  In China, we played pin the tail on the dragon with a dragon I printed out and taped together to make a large dragon and I printed out extra tails.  (it was hard to find a dragon that wasn’t too scary looking!)  I had also purchased supplies for making a ribbon dragon craft, but the kids were getting a little restless at this point, so I just sent that home to make with their mommies.  It would have been a lot of glueing anyway.  They also got these gorgeous wood fans and a fortune cookie for their souvenirs.

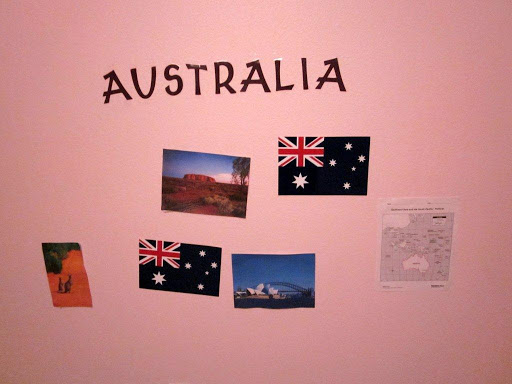
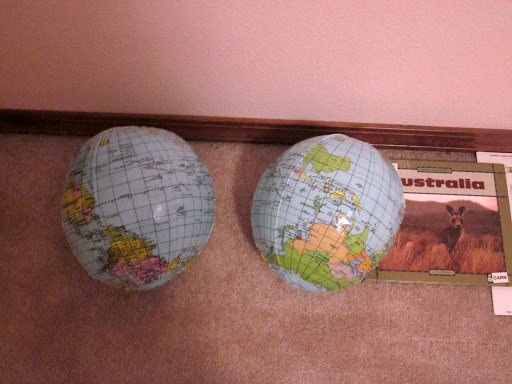
Next, off to the 6th place: Australia
Australia was in Elise’s bedroom and here we played a fun game with the girls.  We formed 2 teams and had a kangaroo hop race (with a globe between their knees).  🙂  Good to get a little of that energy out.  The souvenir was a pink or purple boomerang and an inflatable globe

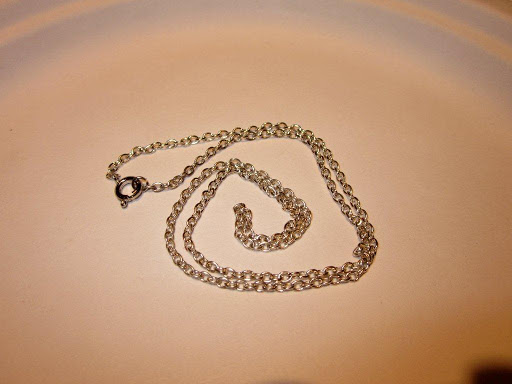
Last stop (bet you can guess): Antarctica
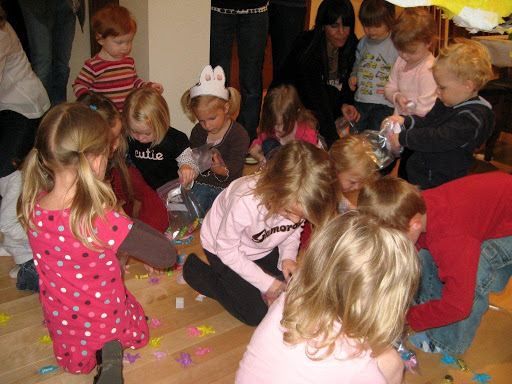
Antarctica was in the kitchen, but we needed tables, so it was more of a fly by Antarctica (too cold to stop there anyway, right?)  The activity for here was melting their ice to find the prize inside.  We gave each girl a cup of hot water to melt their ice cube and inside was a chain (so they could put their charms on it)

I also printed out pictures of the kids I took in the beginning onto sticker paper and they put them in their passports above their name. 
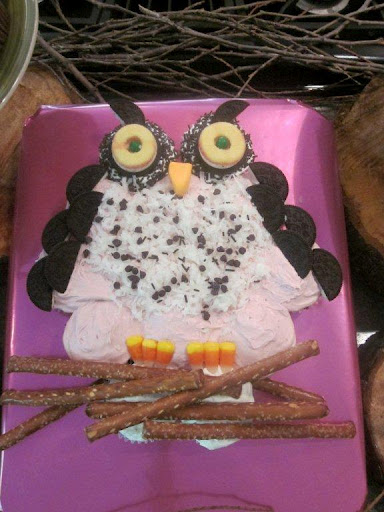
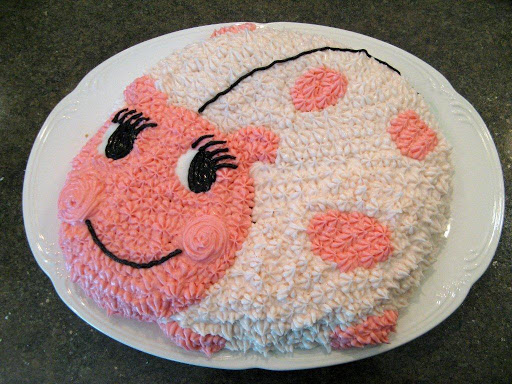
The plan was to fly back to the US for cake, but we technically never did fly back.  We just stayed where we were, sang Happy Birthday for ice cream cake.  Then, opened presents and the girls had time to free play a little before their parents came to pick them up.  It was a really fun party, I think!  Happy birthday Elise!!

5-year old Hello Kitty party

After a half year off, birthday season has come once again.  So, to start things off, Nora decided she would like a Hello Kitty party this year.  I love Hello Kitty, so it was a fun party to plan and relatively easy. 
First off were the invitations:

I bought the Hello Kitty cartridge for my Cricut die cut machine to make these and headed to Ben Franklin to get the cute papers.  For the inside, my super easy trick to adding the words is to print them out on Avery clear full sheet labels found at an office supply store… I love this stuff!  Then you can just cut it to the shape you want and stick it on exactly were you want it.

For the decorations:  I made some more Hello Kitty wall decor from my Cricut and put them all over the walls along with printing off some larger Hello Kitty faces and Daniel (the boy Hello Kitty) because there were boys coming to the party. 

The printed Hello Kitties are a little trickier… since you can’t find large images online with supercrisp edges, I usually find some that I like and “trace” them in Adobe Illustrator (which is a designer’s program that can create images that look crisp and sharp no matter how big or small you stretch stretch them).  (Note: I didn’t make the poster)
I also had the girls go around the house on a Hello Kitty treasure hunt to find little things for decorations like stuffed dolls, books, etc.  And then I bought the licensed plates/cups/table cover, etc. 

For the games:  I did 3 games, plus a pinata.  As we were waiting for more guests to arrive, my wonderful helper and husband, Dave, had the kids in a circle and played “hot potato” using a ball of yarn as the “potato”.  The kids were having fun just tossing it around really fast that we never did end up using the music (we picked the DisneyMania rock version of “We are Siamese” from Lady and the Tramp).  The second game was pin the bow on the Hello Kitty (bought this one).  For the third game, while the kids were eating, I hid a bunch of mice around the room and then had them all get on their hands and knees like Kitties and hunt for the mice.  🙂  They were pretty freaky looking mice too… I was thankful to find them in the Halloween section of the party store.  The pinata was a pull-string one (and it actually worked this time!!) and we filled with candy (of course), stickers, and silly bands!

Food:  This was a pretty easy one this time… only required about a half hour or so of prep time before the party.. it was awesome!  Mini pizzas (English muffins with a little pizza sauce and cheese and baked until the cheese melts), Papa Murphy’s pizza for the adults, strawberry (PINK!) gogurt, strawberries and apples cut up into a little fruit salad, caesar salad for the adults.  Drinks: PINK raspberry lemonaide, Pink strawberry milk or water.  This time we had all the kids sit down at the table and dished up in the kitchen and handed all the kids their plate (was a lot easier than having them all go through a line).  I forgot to take a picture when the food was out, but here are the before pictures:

The cake was from Fred Meyer:  white with white whipped frosting and german chocolate in the middle… it was SUPER yummy!

For the party favors, when the guests first game, they got either a flower clippie for their hair or bow ties for the boys (but the boys didn’t really want to wear them, oh well).  I made the flowers out of pink and yellow Sculpey (with 2 holes in the middle of the flower) and baked them, then used pipe cleaner to add them to silver barretts.  As the guests were leaving, they got a bag with the rest of the favors:  I found some 100 piece puzzles for a really good price at Michaels (Hello Kitty or Princesses for the girls and Toy Story, Cars, etc for the boys), glow bracelets, and for the girls, Hello Kitty lip gloss (Target) and for the boys, a couple sports $1 items.


 And that’s about it!  Happy birthday Nora!!

Trina’s 1st birthday party!

So, another week, another birthday celebration!  This time we celebrated my youngest’s first birthday!  She was super happy and I think she had a great time at her party! 

This was a much simpler party that last week’s because we had the entertainment coming in… my friend, Ms. Rebecca from The Musik Nest came to do a little musical party for the wee ones.  We have had her at all my kids’ 1st and 2nd birthday parties because she is so good with the kids and it is just great for a baby party.

We went with a ladybug theme.  I found a party set that I loved from birthdayexpress.com to order the plates/napkins cups/t-shirt/balloon/etc from and then I traced the 3 different styles of ladybugs in Adobe Illustrator to be able to use to make more of my own decorations.  So, I used those on the evite, to print out for table decorations, to tape to the walls and for making a banner.  I also ordered a ladybug cake pan and decorated Trina’s own personal cake to dig into… her first taste of sugar.

Here are some pictures from the party!

Setting up:
Baby finger foods:
Trina’s ladybug cake:
The birthday girl just woke up from her nap and is ready to party!
Notice the super cute party themed shirt!: 
Music time: 
Trina with her little friends: 
Cake time: 
She likes the little ladybugs! 
Oh yeah!: 
So dainty: 
 
 
My favorite: 
Ladybug pillow from nana and papa: 
Party favors for the babies:
Party favors for the sibblings:

Happy birthday Sweet Trina!!

Cayley’s Max and Ruby party

Yesterday was Cayley’s 3-year old birthday party.  Since she loves Max and Ruby, we wanted to make that the party theme.  Thankfully I started planning this over a month ago because there are no licenced Max and Ruby party supplies.  So, I had to get creative and come up with my own ideas.  So … I started with these websites that I found:
A blog from someone else who did a Max and Ruby party, the author (Rosemary Wells) website, and Nick, Jr.

So, I worked on printing out coloring activities for the tables, printing out most of the “bunny party” ideas from the authors website, bought a homemade Max and Ruby pinata from ebay (super cute), made lilypads and a grass poster for to decorate the bathtub for one of the games, printed out stickers, ordered mostly solid colored plates/cups, books and windup toys for party favors, etc…

So here was my party schedule:

11am – Kids arrive — color on tables and eat lunch
11:30 – Ring toss game/Pin the tail on Max
11:45 – Watch Max and Ruby – cake episode (momma hides frogs)
12:00 – Game – Find Max’s frogs and put them back into the pond
12:15 – Pinata
12:30 – Sing Happy Birthday and Cake


Now I will just let you follow along with the party pictures.  Let me know if you want to learn more about something!

Setting up:

The spread:
The cakes:
Max’s cake
Ruby’s cake
The guests arrive:
Games – part 1 (ring toss and pin the tail on Max):
Watching a Max and Ruby episode:
Game – part 2 (find Max’s frogs hidden in the living room and return to the pond):
Pinata:
Cake:
Party favors (minus the candy necklace… didn’t get the pic quick enough):
Happy Birthday Cayley!!!